Process refunds for ePDQ
For businesses, it’s important to have the ability to process refunds if a customer requests them.
There are two ways in which you can process refunds on ePDQ.
#1 Process refunds via the ePDQ BackOffice
You can process refunds on your ePDQ back-office account. To do this, simply login to either your test or production ePDQ account and kindly follow the official ePDQ back office guide for refunding a payment to learn more.
If you have any questions about processing refunds, we would highly recommend contacting the ePDQ support team and they’ll be more than happy to respond to your concern.
#2 Process refunds via WooCommerce
Step 1 – Creating the API user.
You will need to create the API user, which the plugin will use to make API payment calls to the ePDQ system. You will need to go to Configuration > Users.

Here we want to add a new user; clicking the new user button shows us the following:

The most important element here is the tick box in the red box. This will make this new user work with the API.
You will need to enter your password, the one you signed in with. Once you do that, you will set this new API user password on another screen.
Step 2 Enabling refunds from the ePDQ account
Navigate from your ePDQ account > Configuration > Account > Your options and ensure that the Refund option is activated.
 You can activate the refund option by clicking the “Activate” button if it is still deactivated.
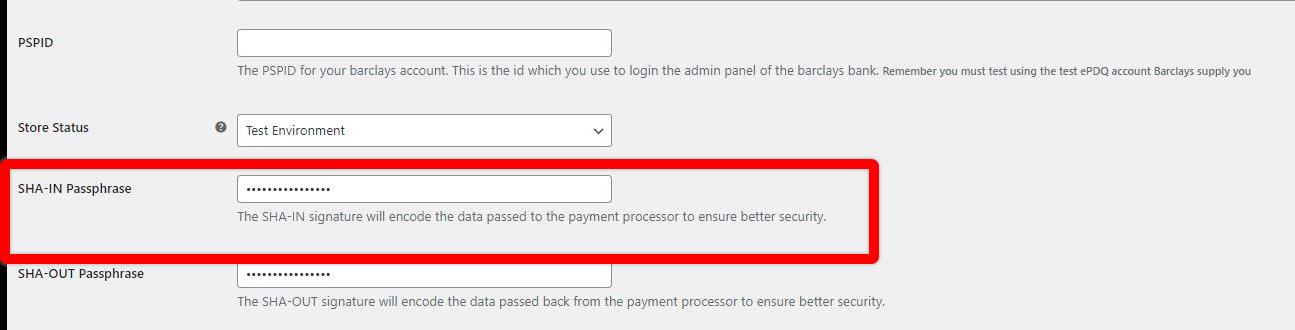
Step 3 Adding the SHA-IN passphrase
Navigate from your ePDQ account > Configuration > Technical information > Data and origin verification and then ensure that you have placed both the SHA-IN passphrase key on the Checks for e-Commerce & Alias Gateway and the Checks for Barclaycard Direct Link section SHA-IN fields.

Note: You’ll only be adding an SHA-IN passphrase on the Checks for Barclaycard Direct link section for processing refunds only as we are using the Direct link API to process refunds.
Ensure that the SHA-IN passphrase only contains letters and numbers only and that it has a maximum of 16 characters.
The SHA-IN passphrase must also be the same as the SHA-IN that you have placed from your WordPress dashboard > WooCommerce > Settings > Payments > AG ePDQ Checkout > Manage > SHA-IN Passphrase.
Step 4 – Plugin settings
Navigate to your WordPress dashboard > WooCommerce > Settings > Payments > AG ePDQ Checkout > Manager and place the credentials of the API user on the fields below:

Step 5 – Processing the refund
Navigate to WooCommerce > Orders and then select the order that you wish to refund.

Click the ‘Refund’ button, and then additional fields would display.

Set the quantity and then click Refund via AG ePDQ Direct Link Checkout, and after a few seconds or so, the order should have been refunded successfully.
 If you are dealing with multiple products, you’ll have to set the quantity of the product you’d want to refund. It should automatically set the Total available to the refund amount.

What if there is an error?
That’s a bit unfortunate, but all problems in this world can eventually be fixed. Please take a look at our Troubleshooting Guide, and hopefully, this would resolve the issue for you, or better yet, you could also contact our support, and one of our friendly support team members will sort out these issues for you.
Was this helpful?

Barclaycard ePDQ Direct Link
Still need help?
Our team are on hand to provide fast, helpful and professional support.
Back End Demo
Start exploring our fully functional demo site today.
Gain exclusive admin access to see what's possible.